How do scientists "see" viruses? Part 1: ELISA
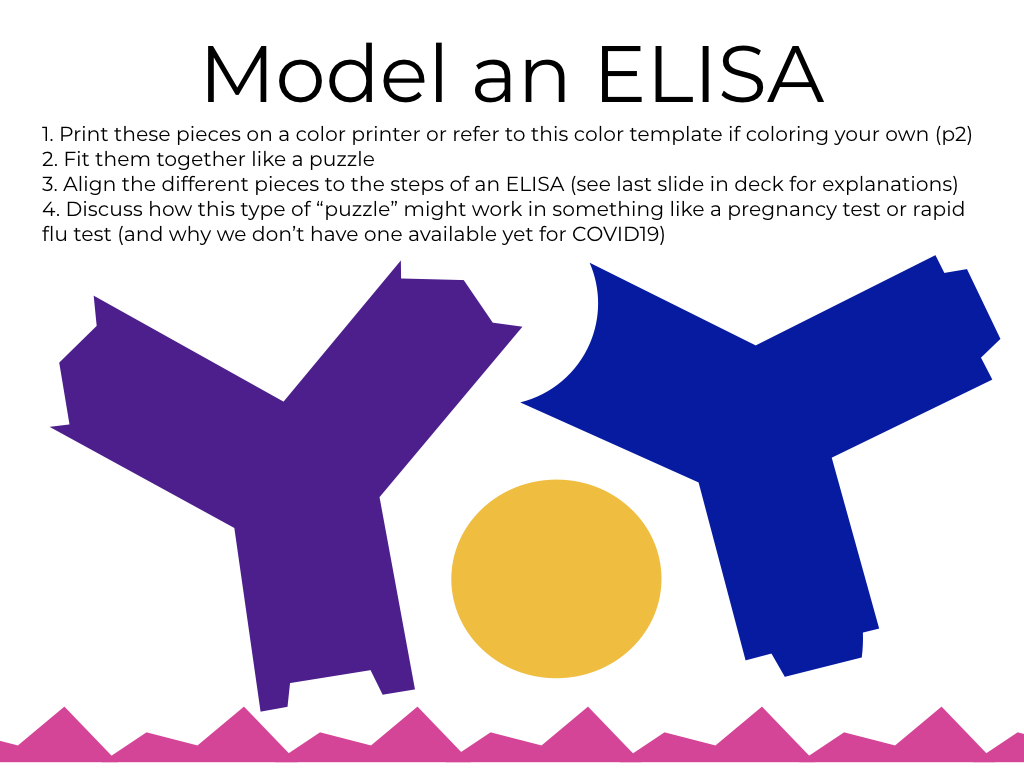
ELISA works like a puzzle, where specific molecules lock together, a bit like puzzle pieces (though actually a bit more wiggly, like if puzzle pieces could shake hands or like this teacher with a unique handshake for each student). In this activity, cut out the puzzle pieces and assemble them just right to model the pieces of an ELISA.
Then, read more in the subsequent sections to learn more about the ELISA technique, antibodies, and more!
Materials

Print out the "puzzle pieces"
Download a template (in the Save & Share menu) and use it to cut the pieces out of felt, construction paper, or a color-printed sheet of paper.
How an ELISA actually works
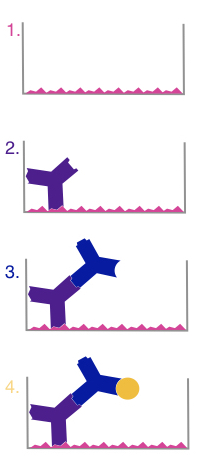
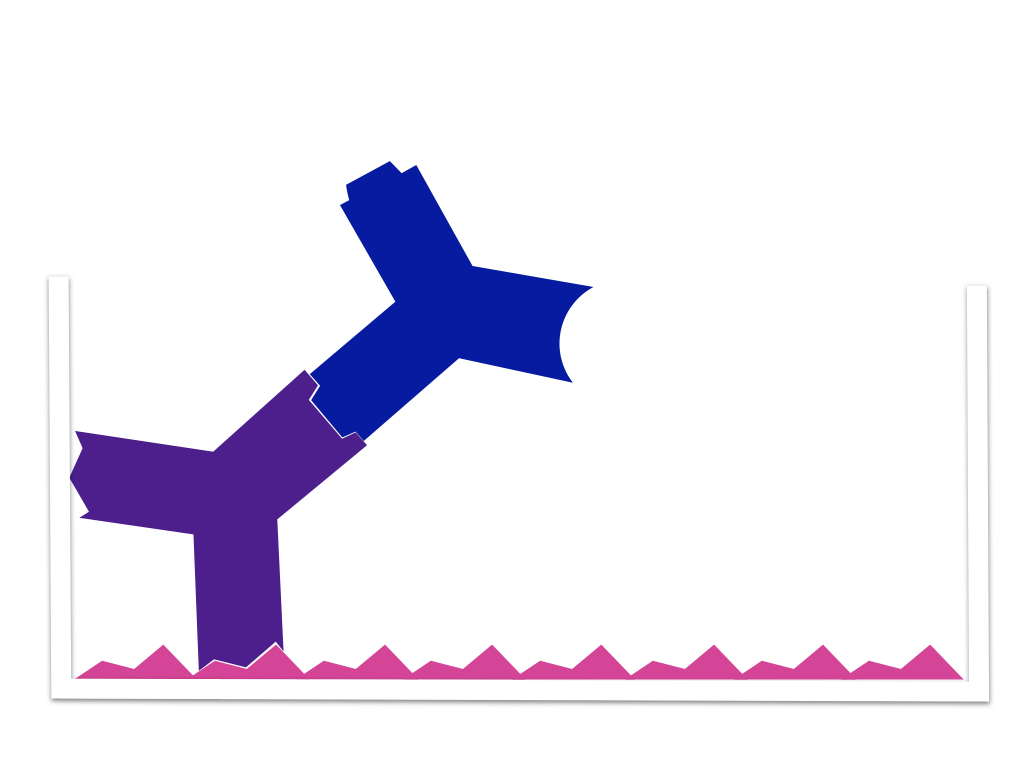
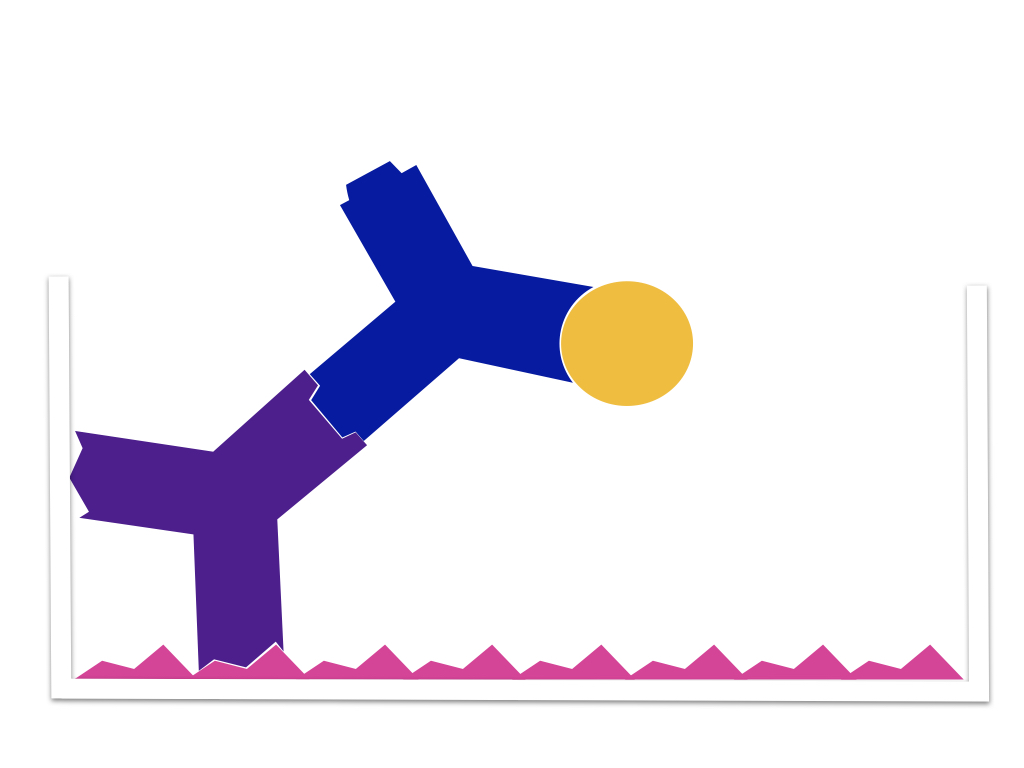
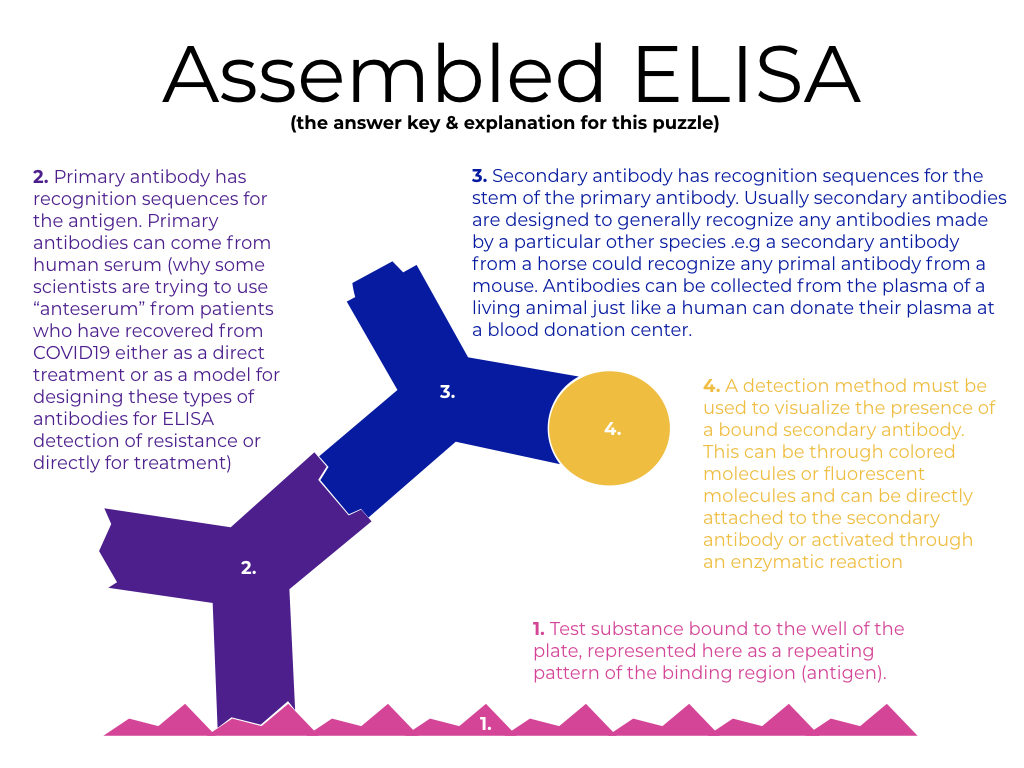
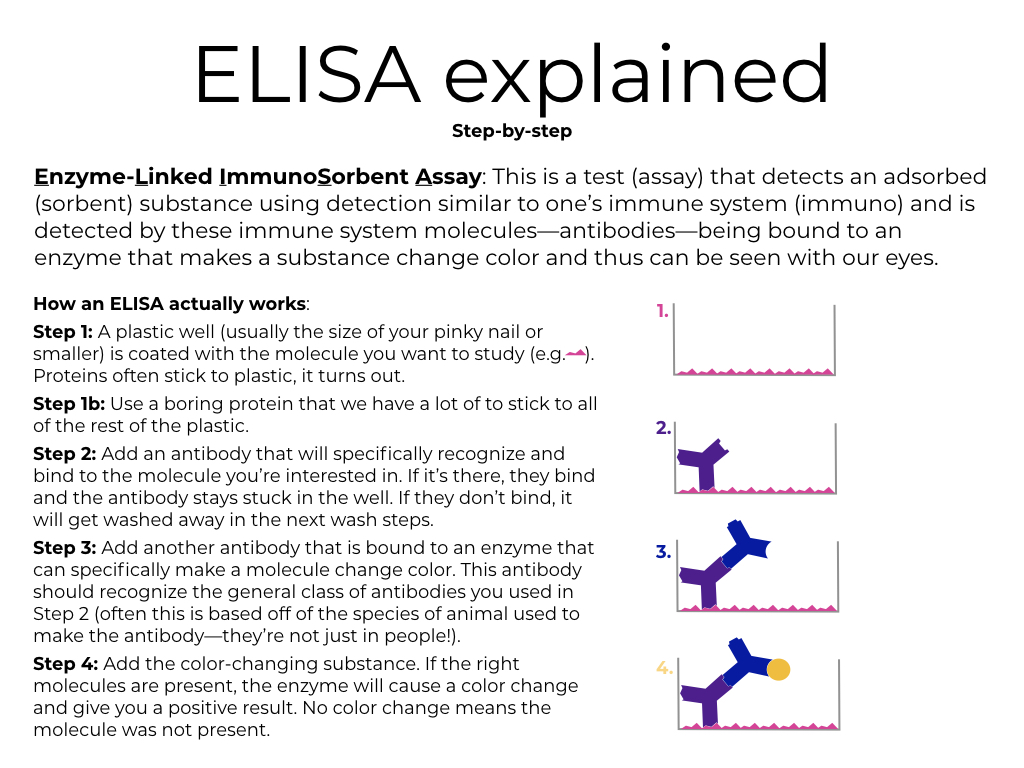
Step 1: A plastic well (usually the size of your pinky nail or smaller) is coated with the molecule you want to study. Proteins often stick to plastic, it turns out.
Step 1b: Use a boring protein that we have a lot of to stick to all of the rest of the plastic.
Step 2: Add an antibody that will specifically recognize and bind to the molecule you’re interested in. If it’s there, they bind and the antibody stays stuck in the well. If they don’t bind, it will get washed away in the next wash steps.
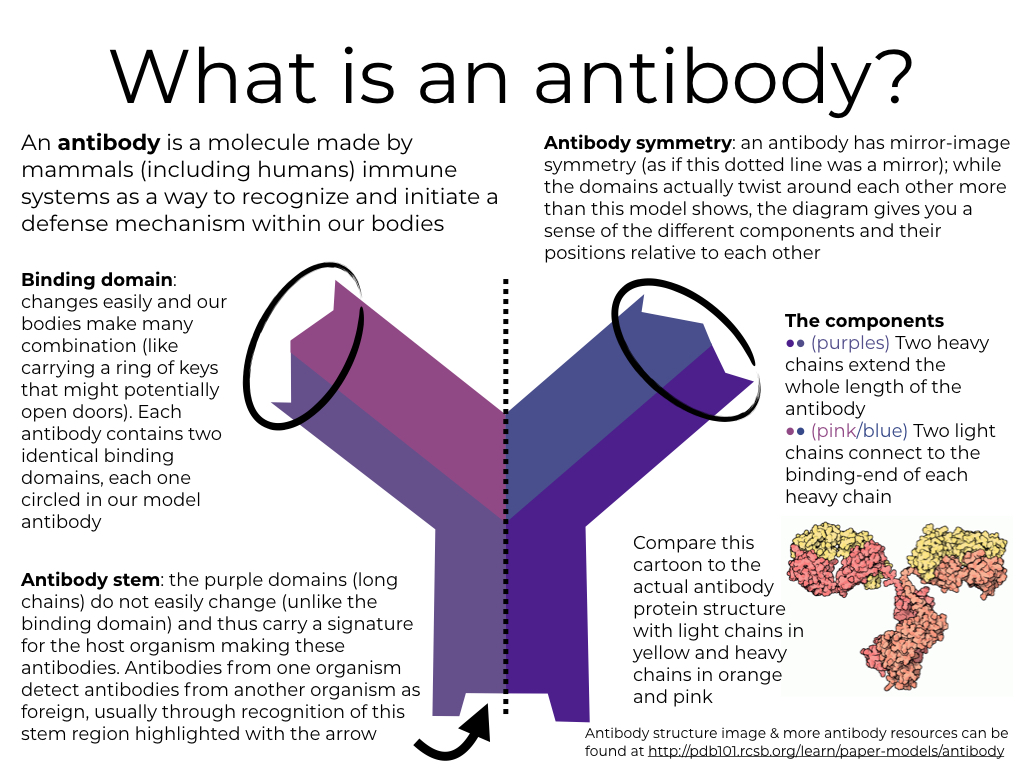
Step 3: Add another antibody that is bound to an enzyme that can specifically make a molecule change color. This antibody should recognize the general class of antibodies you used in Step 2 (often this is based off of the species of animal used to make the antibody—they’re not just in people!).
Step 4: Add the color-changing substance. If the right molecules are present, the enzyme will cause a color change and give you a positive result. No color change means the molecule was not present.

