Jar Test


Soil texture is one of the most important properties of soil and affects many vital soil functions including water retention, drainage, and nutrient storage. The Jar Test is a simple experiment that gives the relative proportions of sand, silt, and clay in your soil, which together determine the soil’s texture.
This experiment works by separating the soil’s particles according to their sizes, with the largest (sand) settling to the bottom of the jar first.
Materials
")
Household/Lab Items
- Soil sieve (2mm), a kids sand sifter toy can work here
- Clear mason jar OR large clear graduated cylinder*
*parafilm needed to seal top if using graduated cylinder - Ruler
- Spoon

Chemicals
- 5% sodium hexametaphosphate solution OR dishwashing detergent powder (ex: Cascade)

Soil
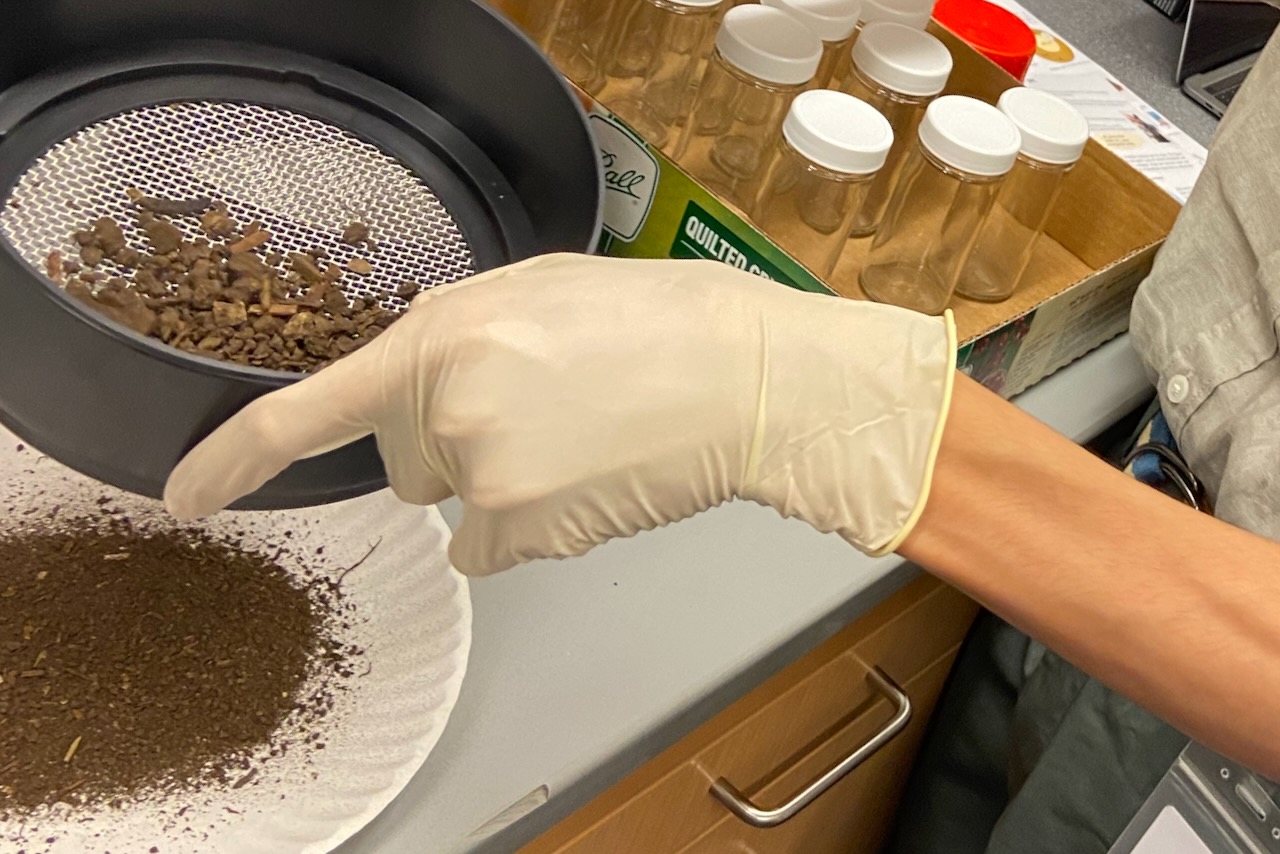
- Sifted soil sample to fill ⅓ of the jar
Protocol
- Collect soil samples from >10 cm deep in your desired location(s).
- Sift the soil past 2 mm in a soil sieve, using a spoon to crush the lumps.
- Fill the jar about ⅓ full with the sifted soil.
- EITHER Add a teaspoon of detergent and fill water to nearly the top of the jar OR add 5% sodium hexametaphosphate to nearly the top of the jar.
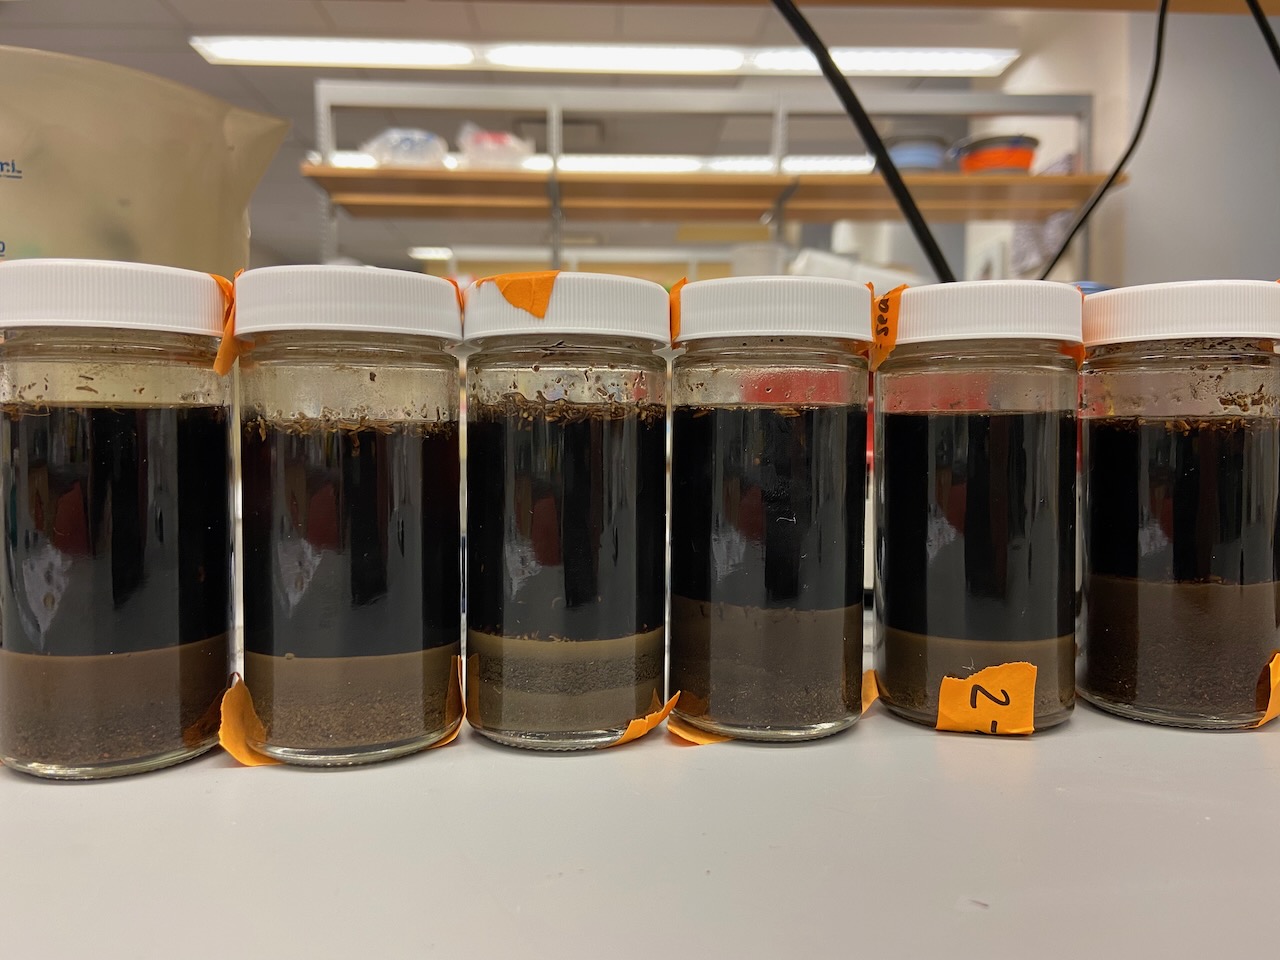
- Cover mason jar with lid or graduated cylinder with parafilm, and shake vigorously for at least 5 minutes.
- Set the jar in a safe, undisturbed place where it can remain for 2 days.
- After 1 minute, mark the first layer. This is the sand layer.
- After 2 hours, mark the second layer (the silt layer).
- After 2 days, mark the last layer (the clay layer).
- Using a ruler (or the tick marks on the graduated cylinder), measure and record the thickness of each of the three layers and the thickness of all three layers combined.
- To calculate the proportion of each layer, divide each layer’s thickness by the sum of that of all three layers. Multiply your answer by 100 to get a percentage.
- Analyze your data! Use the texture triangle (see below) to determine what textural class your soil is. Follow the lines that run parallel to the line extending out from the zero-point for each component.

This texture triangle can be used to categorize a soil type based on the relative percentages of clay, silt, and sand. Follow the lines that run parallel to the zero-point for each component (and see the bold arrows as examples). Image from USDA.gov.
Discussion
Could you make further physical observations about sand, silt, and clay particles now that you’ve separated them? What does each feel like to the touch? What does each look like under a microscope? Does each have a consistent color? How does water travel through each type of particle?
What are some ways you could visually represent the soil texture data you get from the Jar Test?
What could be the benefit of having particles of different sizes in soil?
References Links
Soil Texture Analysis – Clemson University https://hgic.clemson.edu/factsheet/soil-texture-analysis-the-jar-test/
Analyze Your Garden Soil At Home – Oregon State https://extension.oregonstate.edu/gardening/techniques/analyze-your-garden-soil-home-jar-test
Estimating Soil Texture – Colorado State Extension https://cmg.extension.colostate.edu/Gardennotes/214.pdf


")


